자바는 C++이나 C#과는 다르게 enum을 int로 형변환 하는 등 제대로 사용하려면 많이 구현해 주어야 한다.
아래와 같은 enum이 있다고 하였을 경우, Carrier.SKT enum을 int로 변환하려고 할때 다음을 호출하면 0이 리턴 된다.
Carrier.SKT.getValue();
그리고 1을 Carrier.KT로 변환하려 할때는 다음과 같이 한다.
Carrier.values()[1];
public enum Carrier {
SKT(0),
KT(1),
LGT(2),
NA(3);
int value = 0;
Carrier(int value) {
this.value = value;
}
public int getValue() {
return value;
}
@Override
public String toString() {
switch (value) {
case 0:
return "SKT";
case 1:
return "KT";
case 2:
return "U+";
default:
return "N/A";
}
}
}
Showing posts with label Java. Show all posts
Showing posts with label Java. Show all posts
Wednesday, April 26, 2017
Java Singleton 문제 정답(DCL)
public class Singleton {
//쓰레드에서 변수의 변화를 바로 감지하게 하기 위함
private volatile static Singleton instance;
private Singleton() {
}
public static Singleton getInstance() {
// 생성할때만 초기화 한다.
if (instance == null) {
// 클래스 단위로 락을 건다. static 이므로
synchronized (Singleton.class) {
if (instance == null) {
instance = new Singleton();
}
}
}
return instance;
}
}
Wednesday, July 13, 2016
Java GC root
GC의 reachability를 판단할때는 다음과 같은 GC root 노드를 기준으로 판단한다. 그 GC root에 해당하는 것들은 다음과 같은 것이 있다.
The so-called GC (Garbage Collector) roots are objects special for garbage collector. Garbage collector collects those objects that are not GC roots and are not accessible by references from GC roots.
There are several kinds of GC roots. One object can belong to more than one kind of root. The root kinds are:
- Class - class loaded by system class loader. Such classes can never be unloaded. They can hold objects via static fields. Please note that classes loaded by custom class loaders are not roots, unless corresponding instances of java.lang.Class happen to be roots of other kind(s).
- Thread - live thread
- Stack Local - local variable or parameter of Java method
- JNI Local - local variable or parameter of JNI method
- JNI Global - global JNI reference
- Monitor Used - objects used as a monitor for synchronization
- Held by JVM - objects held from garbage collection by JVM for its purposes. Actually the list of such objects depends on JVM implementation. Possible known cases are: the system class loader, a few important exception classes which the JVM knows about, a few pre-allocated objects for exception handling, and custom class loaders when they are in the process of loading classes. Unfortunately, JVM provides absolutely no additional detail for such objects. Thus it is up to the analyst to decide to which case a certain "Held by JVM" belongs.
Thursday, May 5, 2016
Java 하위 폴더 모든 소스 컴파일 빌드
다음과 같이 build.sh를 만들면 src폴더 하위에 있는 모든 java파일을 컴파일 할수 있다.
java파일과 같은 폴더내에 class파일이 만들어진다.
cd src
javac -cp . -d . $(find . -name *.java)
java파일과 같은 폴더내에 class파일이 만들어진다.
cd src
javac -cp . -d . $(find . -name *.java)
Sunday, August 16, 2015
Java 트위터 API twitter4j 사용하기(OAuth)
트위터 API로 트위터에 접속하는 방법을 설명한다. 언어는 JSP이고 라이브러리는 twitter4j이다.
이클립스 설정은 아래의 글을 확인하면 된다.
http://duongame.blogspot.kr/2015/08/blog-post_16.html
개괄적인 트위터 API의 예제에 대한것은 트랙백을 참고하고, 소스위주로 설명한다. 아직은 서버가 없으므로 localhost에서 톰캣으로 한다.
먼저 트위터 개발자 계정(http://dev.twitter.com)에 가서 create an app을 한다.

application을 만들었으면 거기서 customer key와 customer secret을 복사하여 twitter.java에 다음과 같이 입력한다.

public class TwitterClient {
public TwitterClient() {
System.out.println("TwitterClient.TwitterClient");
}
Twitter twitter;
RequestToken requestToken = null;
AccessToken accessToken = null;
final String CONSUMER_KEY = "IAsSj*****************";
final String CONSUMER_SECRET = "MKxMB**********************************";
그리고 Callback URL을 등록을 한다. localhost는 등록이 되지 않으므로 127.0.0.1:8080으로 등록하자. 위에서는 http://127.0.0.1:8080/twt/redirect.jsp로 등록을 했다.
다음 이클립스 화면과 같이 TwitterClient.java와 index.jsp, main.jsp, signin.jsp, redirect.jsp를 만들자.

index.jsp는 그냥 main.jsp로 redirect하는 역할만 한다. 나중에 메인 페이지를 다른것으로 만들기 위해서 만들어 놨다.
<script>
location.href = "main.jsp";
</script>
main.jsp는 signin.jsp에 링크만 걸어놨다.
<a href="signin.jsp">트위터</a>
signin.jsp는 requestToken을 만들고 authorizationURL을 만들어서 twitter로 redirect를 한다. requestToken을 만드는 과정은 twitter4j에 customer key와 customer secret을 넘겨주면 완성된다. redirect.jsp에 넘겨주기 위해 생성된 requestToken과 TwitterClient 객체를 session에 저장한다.
[signin.jsp]
<%@page import="twt.TwitterClient"%>
<%@page import="twitter4j.auth.RequestToken"%>
<%
TwitterClient tw = new TwitterClient();
RequestToken token = tw.getRequestToken();
String authUrl = token.getAuthorizationURL();
session.setAttribute("requestToken", token);
session.setAttribute("tw", tw);
%>
<script>
location.href = "<%=authUrl%>";
</script>
[TwitterClient.java]
public RequestToken getRequestToken()
{
twitter = new TwitterFactory().getInstance();
twitter.setOAuthConsumer(CONSUMER_KEY, CONSUMER_SECRET);
requestToken = null;
try {
requestToken = twitter.getOAuthRequestToken();
}
catch(TwitterException te) {
te.printStackTrace();
}
System.out.print("TwitterClient.getRequestToken: ");
System.out.print(requestToken.getToken() + " ");
System.out.println(requestToken.getAuthorizationURL());
return requestToken;
}
그러면 이제 최종적으로 redirect.jsp를 보자. 이 페이지는 twitter 서버에서 등록해둔 호출 서버로 redirect page로 redirect되는데 우리가 127.0.0.1로 해놓았기 때문에 다시 우리 데스크탑 서버로 돌아온다.
parameter중에서 oauth_token이 그 응답이다. 이것을 가지고 아까 저장해준 TwitterClient와 RequestToken을 꺼내서 getAccessToken을 하면 접속이 완료된다. 그후에 타임라인을 테스트하는 함수인 printStatuses를 부르면 이클립스 콘솔창에 현재 타임라인이 나타나는 것을 볼수 있다.
[rediect.jsp]
<%@page import="twt.TwitterClient"%>
<%@page import="twitter4j.auth.AccessToken"%>
<%@page import="twitter4j.auth.RequestToken"%>
<%
// twitter에서 넘겨줌
String oauth_token = request.getParameter("oauth_token");
// signin.jsp에서 저장한 것들
RequestToken token = (RequestToken)session.getAttribute("requestToken");
TwitterClient tw = (TwitterClient)session.getAttribute("tw");
tw.getAccessToken(oauth_token, token);
tw.printStatuses();
%>
[TwitterClient.java]
public AccessToken getAccessToken(String oauthToken, RequestToken requestToken)
{
if(requestToken == null) {
System.out.print("requestToken == null");
}
if(oauthToken == null) {
System.out.print("oauthToken == null");
}
twitter = new TwitterFactory().getInstance();
twitter.setOAuthConsumer(CONSUMER_KEY, CONSUMER_SECRET);
System.out.println("TwitterClient.getAccessToken: ");
if(requestToken.getToken().equals(oauthToken)) {
try {
System.out.print("requestToken: ");
System.out.print(requestToken.getToken() + " ");
System.out.println(requestToken.getTokenSecret());
accessToken = twitter.getOAuthAccessToken(requestToken);
//accessToken = twitter.getOAuthAccessToken(token.getToken(), token.getTokenSecret());
twitter.setOAuthAccessToken(accessToken);
System.out.print("accessToken: ");
System.out.print(accessToken.getToken() + " ");
System.out.println(accessToken.getTokenSecret());
}
catch(TwitterException te) {
te.printStackTrace();
}
}
else {
System.out.println("oauth_token error");
}
return accessToken;
}
public void printStatuses()
{
ResponseList<Status> statuses;
Paging page = new Paging();
page.count(20);
page.setPage(1);
try {
statuses = twitter.getHomeTimeline(page);
for (Status status : statuses) {
//status.getId()
System.out.println(status.getUser().getScreenName() + ":" + status.getText());
//status.getUser().getScreenName()
//status.getUser().getURL()
//status.getText()
//status.getCreatedAt()
//status.getUser().getProfileImageURL()
//status.getSource()
}
}
catch(TwitterException te) {
te.printStackTrace();
}
}
이제 실행을 해보자. 서버의 hostname은 반드시 127.0.0.1이고 port는 8080이어야 한다. hostname이 localhost라면 session문제가 생기므로 새로운 서버를 만들기 바란다.
signin.jsp를 실행한 화면

애플리케이션 승인후에 redirect.jsp를 부르는 화면

redirect.jsp로 와서 timeline을 display하는 화면

Java 이클립스 톰캣연동
이클립스와 톰캣연동은 수많은 강좌가 있지만 최신버전이 대한 강좌는 없어서 작성해 보았다. 이걸 왜 작성하려 했냐면 트위터가 원하는
기능이 너무 없어서 트위터 API를 만들어서 구글 앱엔진에 올리기 위해서였다. 그래서 이후에는 트위터 연동도 할거고 구글
앱엔진에도 올릴 예정이다.
이클립스 - 버전 3.7 Indigo http://www.eclipse.org/downloads/packages/eclipse-ide-java-ee-developers/indigor
이클립스는 JSP를 연동하려면 무조건 Java EE 버전을 다운 받아야 한다. 안그러면 다른 플러그인(WTP)을 받아야 하는 수고를 해야한다.
톰캣 - 7.0 http://tomcat.apache.org/download-70.cgi
먼저 이클립스를 다음과 같이 실행한다. 실행한 다음 아래의 탭에서 [Server] – [New] – [Server]를 선택한다. ([File] – [New] – [Other]에서 시작해도 마찬가지다.)


다음과 같이 Define a New Server창이 나타나는데 여기서 Tomcat v7.0 서버를 고른다.(Basic HTTP Server를 고르면 안됨)

Tomcat 7.0이 설치된 위치를 입력하자.

위치를 잘못 입력하면 찾을 수 없다고 친절히 안내해 준다.

아래와 같이 Tomcat v7.0 Server가 localhost에 생겼다.

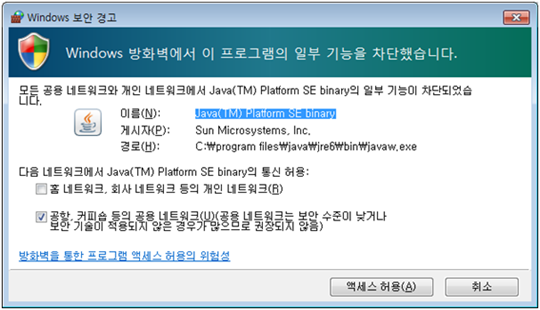
이제 이클립스에서 Tomcat을 실행시켜보자. 다음과 같은 방화벽이 나오면 허용해주자.

허용하자마자 기존에 백그라운드로 톰캣이 돌고 있으면 포트충돌이 있다고 안내해준다.

백그라운드 톰캣은 중지해주자.

그러면 다시 자바를 허용하라고 방화벽 메세지가 나온다. 허용하면 톰캣이 실행된다.

이제는 테스트 프로젝트를 만들어 보자.
[File] – [New] – [Dynamic Web Project]를 선택하고 Project name으로 “testjsp”를 입력한다.

다음과 같이 Server 밑에 testjsp가 만들어졌다.

그리고 바로 Run을 해보자. Run on Server를 선택하자.

어떤 서버에서 실행할 것인가를 묻는다. 여러개를 만들수 있다. 아까 만들어진 Tomcat 7.0 서버를 선택하자.

이제는 프로젝트의 파일들를 선택하는란이다. Finish를 하자.

서버를 시작할때 기존에 실행중인 서버를 재시작 할것인가를 묻는다. 일반적으로 재시작 안해도 되는데 매번 재시작을 할수도 있다. 아무거나 선택하자.

실행하면 이클립스 안에서 웹이 뜨는데 에러가 났다. http://localhost:8080/testjsp/index.jsp우리는 index.jsp가 없기 때문에 에러가 난 것이었다.


이제 index.jsp를 만들어 주자. 다음과 같이 out.println해보자.

실행을 시키면 out.println이 정상적으로 된다.

이상 이클립스와 톰캣 JSP가 연동이 되었다.
이클립스 - 버전 3.7 Indigo http://www.eclipse.org/downloads/packages/eclipse-ide-java-ee-developers/indigor
이클립스는 JSP를 연동하려면 무조건 Java EE 버전을 다운 받아야 한다. 안그러면 다른 플러그인(WTP)을 받아야 하는 수고를 해야한다.
톰캣 - 7.0 http://tomcat.apache.org/download-70.cgi
먼저 이클립스를 다음과 같이 실행한다. 실행한 다음 아래의 탭에서 [Server] – [New] – [Server]를 선택한다. ([File] – [New] – [Other]에서 시작해도 마찬가지다.)


다음과 같이 Define a New Server창이 나타나는데 여기서 Tomcat v7.0 서버를 고른다.(Basic HTTP Server를 고르면 안됨)

Tomcat 7.0이 설치된 위치를 입력하자.

위치를 잘못 입력하면 찾을 수 없다고 친절히 안내해 준다.

아래와 같이 Tomcat v7.0 Server가 localhost에 생겼다.

이제 이클립스에서 Tomcat을 실행시켜보자. 다음과 같은 방화벽이 나오면 허용해주자.

허용하자마자 기존에 백그라운드로 톰캣이 돌고 있으면 포트충돌이 있다고 안내해준다.

백그라운드 톰캣은 중지해주자.

그러면 다시 자바를 허용하라고 방화벽 메세지가 나온다. 허용하면 톰캣이 실행된다.
이제는 테스트 프로젝트를 만들어 보자.
[File] – [New] – [Dynamic Web Project]를 선택하고 Project name으로 “testjsp”를 입력한다.

다음과 같이 Server 밑에 testjsp가 만들어졌다.

그리고 바로 Run을 해보자. Run on Server를 선택하자.

어떤 서버에서 실행할 것인가를 묻는다. 여러개를 만들수 있다. 아까 만들어진 Tomcat 7.0 서버를 선택하자.

이제는 프로젝트의 파일들를 선택하는란이다. Finish를 하자.

서버를 시작할때 기존에 실행중인 서버를 재시작 할것인가를 묻는다. 일반적으로 재시작 안해도 되는데 매번 재시작을 할수도 있다. 아무거나 선택하자.

실행하면 이클립스 안에서 웹이 뜨는데 에러가 났다. http://localhost:8080/testjsp/index.jsp우리는 index.jsp가 없기 때문에 에러가 난 것이었다.


이제 index.jsp를 만들어 주자. 다음과 같이 out.println해보자.

실행을 시키면 out.println이 정상적으로 된다.

이상 이클립스와 톰캣 JSP가 연동이 되었다.
Wednesday, April 22, 2015
Java JRE Mac Elipse에 설치하기
아래에서 JDK 1.7을 다운 받는다.
http://www.oracle.com/technetwork/java/javase/downloads/index.html
그러면 /Library/Java/JavaVirtualMachines/jdk1.7.0_<something>.jdk/Contents/Home 폴더에 생성이 되는데 이 패스를 Eclipse의 Preferences -> Java -> Installed JREs에서 추가한다.
아래의 화면에서 Standard VM으로 선택하여 패스를 추가한다.

http://www.oracle.com/technetwork/java/javase/downloads/index.html
그러면 /Library/Java/JavaVirtualMachines/jdk1.7.0_<something>.jdk/Contents/Home 폴더에 생성이 되는데 이 패스를 Eclipse의 Preferences -> Java -> Installed JREs에서 추가한다.
아래의 화면에서 Standard VM으로 선택하여 패스를 추가한다.

Tuesday, April 21, 2015
Java 서버 프로그램 nohup 백그라운드 실행 및 종료
자바로 만든 서버 파일이 server.jar일때 이 jar를 실행하는 방법은 다음과 같다.
java -jar server.jar
그러나 이렇게 하면 백그라운드 실행이 안되므로 다음과 같이 start/stop.sh를 만들었다.
[start.sh]
nohup java -jar server.jar >/dev/null 2>&1 &
java -jar server.jar
그러나 이렇게 하면 백그라운드 실행이 안되므로 다음과 같이 start/stop.sh를 만들었다.
[start.sh]
nohup java -jar server.jar >/dev/null 2>&1 &
[stop.sh]
pid=`ps -ef | grep server.jar | grep -v 'grep' | awk '{print $2}'`
kill -9 $pidMonday, April 6, 2015
Java Triple DES 예제
Triple DES Security Java 소스이다.
다른 소스와 다른 점은 NoSuchAlgorithm이 날 경우에 SunJCE를 설치하여 Exception을 없앤 소스라는 것...
/*
* Copyright (c) 2000 David Flanagan. All rights reserved.
* This code is from the book Java Examples in a Nutshell, 2nd Edition.
* It is provided AS-IS, WITHOUT ANY WARRANTY either expressed or implied.
* You may study, use, and modify it for any non-commercial purpose.
* You may distribute it non-commercially as long as you retain this notice.
* For a commercial use license, or to purchase the book (recommended),
* visit http://www.davidflanagan.com/javaexamples2.
*/
import java.io.DataInputStream;
import java.io.File;
import java.io.FileInputStream;
import java.io.FileOutputStream;
import java.io.IOException;
import java.io.InputStream;
import java.io.OutputStream;
import java.security.InvalidKeyException;
import java.security.NoSuchAlgorithmException;
import java.security.Provider;
import java.security.Security;
import java.security.spec.InvalidKeySpecException;
import javax.crypto.BadPaddingException;
import javax.crypto.Cipher;
import javax.crypto.CipherOutputStream;
import javax.crypto.IllegalBlockSizeException;
import javax.crypto.KeyGenerator;
import javax.crypto.NoSuchPaddingException;
import javax.crypto.SecretKey;
import javax.crypto.SecretKeyFactory;
import javax.crypto.spec.DESedeKeySpec;
/**
* This class defines methods for encrypting and decrypting using the Triple DES
* algorithm and for generating, reading and writing Triple DES keys. It also
* defines a main() method that allows these methods to be used from the command
* line.
*/
public class TripleDES {
/**
* The program. The first argument must be -e, -d, or -g to encrypt,
* decrypt, or generate a key. The second argument is the name of a file
* from which the key is read or to which it is written for -g. The -e and
* -d arguments cause the program to read from standard input and encrypt or
* decrypt to standard output.
*/
public static void main(String[] args) {
try {
// Check to see whether there is a provider that can do TripleDES
// encryption. If not, explicitly install the SunJCE provider.
try {
Cipher c = Cipher.getInstance("DESede");
} catch (Exception e) {
// An exception here probably means the JCE provider hasn't
// been permanently installed on this system by listing it
// in the $JAVA_HOME/jre/lib/security/java.security file.
// Therefore, we have to install the JCE provider explicitly.
System.err.println("Installing SunJCE provider.");
Provider sunjce = new com.sun.crypto.provider.SunJCE();
Security.addProvider(sunjce);
}
// This is where we'll read the key from or write it to
File keyfile = new File(args[1]);
// Now check the first arg to see what we're going to do
if (args[0].equals("-g")) { // Generate a key
System.out.print("Generating key. This may take some time...");
System.out.flush();
SecretKey key = generateKey();
writeKey(key, keyfile);
System.out.println("done.");
System.out.println("Secret key written to " + args[1]
+ ". Protect that file carefully!");
} else if (args[0].equals("-e")) { // Encrypt stdin to stdout
SecretKey key = readKey(keyfile);
encrypt(key, System.in, System.out);
} else if (args[0].equals("-d")) { // Decrypt stdin to stdout
SecretKey key = readKey(keyfile);
decrypt(key, System.in, System.out);
}
} catch (Exception e) {
System.err.println(e);
System.err.println("Usage: java " + TripleDES.class.getName()
+ " -d|-e|-g <keyfile>");
}
}
/** Generate a secret TripleDES encryption/decryption key */
public static SecretKey generateKey() throws NoSuchAlgorithmException {
// Get a key generator for Triple DES (a.k.a DESede)
KeyGenerator keygen = KeyGenerator.getInstance("DESede");
// Use it to generate a key
return keygen.generateKey();
}
/** Save the specified TripleDES SecretKey to the specified file */
public static void writeKey(SecretKey key, File f) throws IOException,
NoSuchAlgorithmException, InvalidKeySpecException {
// Convert the secret key to an array of bytes like this
SecretKeyFactory keyfactory = SecretKeyFactory.getInstance("DESede");
DESedeKeySpec keyspec = (DESedeKeySpec) keyfactory.getKeySpec(key,
DESedeKeySpec.class);
byte[] rawkey = keyspec.getKey();
// Write the raw key to the file
FileOutputStream out = new FileOutputStream(f);
out.write(rawkey);
out.close();
}
/** Read a TripleDES secret key from the specified file */
public static SecretKey readKey(File f) throws IOException,
NoSuchAlgorithmException, InvalidKeyException,
InvalidKeySpecException {
// Read the raw bytes from the keyfile
DataInputStream in = new DataInputStream(new FileInputStream(f));
byte[] rawkey = new byte[(int) f.length()];
in.readFully(rawkey);
in.close();
// Convert the raw bytes to a secret key like this
DESedeKeySpec keyspec = new DESedeKeySpec(rawkey);
SecretKeyFactory keyfactory = SecretKeyFactory.getInstance("DESede");
SecretKey key = keyfactory.generateSecret(keyspec);
return key;
}
/**
* Use the specified TripleDES key to encrypt bytes from the input stream
* and write them to the output stream. This method uses CipherOutputStream
* to perform the encryption and write bytes at the same time.
*/
public static void encrypt(SecretKey key, InputStream in, OutputStream out)
throws NoSuchAlgorithmException, InvalidKeyException,
NoSuchPaddingException, IOException {
// Create and initialize the encryption engine
Cipher cipher = Cipher.getInstance("DESede");
cipher.init(Cipher.ENCRYPT_MODE, key);
// Create a special output stream to do the work for us
CipherOutputStream cos = new CipherOutputStream(out, cipher);
// Read from the input and write to the encrypting output stream
byte[] buffer = new byte[2048];
int bytesRead;
while ((bytesRead = in.read(buffer)) != -1) {
cos.write(buffer, 0, bytesRead);
}
cos.close();
// For extra security, don't leave any plaintext hanging around memory.
java.util.Arrays.fill(buffer, (byte) 0);
}
/**
* Use the specified TripleDES key to decrypt bytes ready from the input
* stream and write them to the output stream. This method uses uses Cipher
* directly to show how it can be done without CipherInputStream and
* CipherOutputStream.
*/
public static void decrypt(SecretKey key, InputStream in, OutputStream out)
throws NoSuchAlgorithmException, InvalidKeyException, IOException,
IllegalBlockSizeException, NoSuchPaddingException,
BadPaddingException {
// Create and initialize the decryption engine
Cipher cipher = Cipher.getInstance("DESede");
cipher.init(Cipher.DECRYPT_MODE, key);
// Read bytes, decrypt, and write them out.
byte[] buffer = new byte[2048];
int bytesRead;
while ((bytesRead = in.read(buffer)) != -1) {
out.write(cipher.update(buffer, 0, bytesRead));
}
// Write out the final bunch of decrypted bytes
out.write(cipher.doFinal());
out.flush();
}
}
Subscribe to:
Posts (Atom)